After a form has been released, what need your extra attention could be its Submits, namely the form content filled in and submitted by others and the information you have collected.
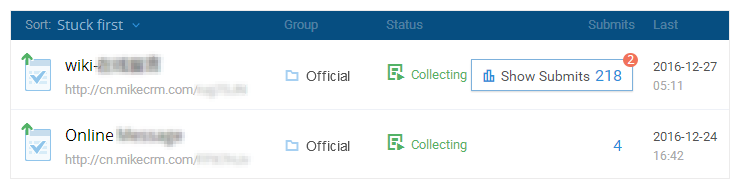
In the form list, there is a column named "Submits" that displays the number of Submits that one form has collected. The red number at the upper right corner means the number of unread Submits. Mousing over the numbers, the "Show Submits" button will show itself. Clicking the button, you can enter the Submit Manager page of the form, where two kinds of views are prepared: List View and Charts View.
In this article, we focus on "List View" only. The Submit list is made up of rows of Submits, and you may view the detail of each Submit. Meanwhile, you can filter and organize Submits in bulk.

Form-Submit List
There are several frequently-used lists in MikeCRM dashboard, such as the contact list in the Contact Manager page, the form list in the Form Manager page, and the Form-Submit list here. Though the content in these lists are different, many features in the lists are similar. So, you may learn the features in these lists together.
The Content of Submit List

The Submit list displays Submit Number (#), Submit Date, and Location by default. The Submit Number (#) means the ordinal number of a Submit in the list, equal to the rank of the Submit in the total submits collected by the form in chronological order. As to Submit Date and Location, it is easier to understand. Please note, the Location is mapped from the IPs where the Submit was collected based on IP geolocation databases. Since ISPs (Internet Service Providers) change their IP addresses distribution mechanism from time to time, the Location is not 100% accurate.
In addition, if a form includes Sale and contact widgets, the Form-Submit list will display products and contact information in sequence after the Location. When a contact name is in the list, you may click on the name and jump to the corresponding contact details page (A prerequisite: "Contact Auto-creation" is enabled in the form).
In front of each Submit record, there are 3 icons: Star, Process and Comment. You may click "Star" and "Process" to switch their status between Star and Unstar, Processed and Unprocessed. The lighted "Comment" icon implies that the Submit has comments. Then you may click it to view the Submit Details window and add comments. It is easy to use, right?
Customize Display Columns
If you don't want some columns to be displayed in the list, you can click "Customize Display Columns" icon in the upper right corner and customize the columns to be displayed. Besides, you can change the order of columns based on your requirement.

Displayable Columns include: all questions in the form, Submit Number (#), Submit Date and Location, and UID. The UID is created to distinguish Submit Number. Since UID refers to the number that a Submit ranks in all forms' Submits, it might not be continuous numbers in one form. By the latest UID, you can know the total Submits you have collected in all your forms.
Bulk Edit
"Bulk Edit" button will show itself after you select any checkbox in front of each Submit record. Clicking the button and choosing options in the dropdown, you are able to edit Submits selected in bulk.

You may change Submit status in bulk as Read/Unread, Star/Unstar, and Processed/ Unprocessed. You may also choose to remove the Submits.
Clicking on "Export & Download", you are able to download the selected Submits and the uploaded files in the Submits to your local device. This feature is great, especially when it is used along with the Show Marked and the Structural Filter feature. You may filter out the Submits you want by the Show Marked or the Structural Filter, then download them with the Export & Download feature to keep them on file.
If a form is enabled with "Contact Auto-creation", you may use "Group Corresponding Contacts" to categorize the contacts created by the Submits into a specific group. Moreover, you may use the "Structural Filter" first and then categorize these filtered contacts into a more specific group. By this means, the later maintenance and marketing management would become far easier than you expected.
Submit Details

Submit Quickview
Just like the way you quickly view a contact and a form, you can check the details of an individual Submit in a quickview window, too. Specifically, after you double click one Submit or hit the blue "<" icon at the far right side, the quickview window will show the details of the Submit at the right. Want to see details of another Submit? Just click any other Submit and the quickview window will refresh to display corresponding Submit details.
The detail pop-up window includes details of the Submit, Submit Number (#), Submit Date, operation buttons at the top and Comment at the bottom.
Read and Unread: like the Read and Unread function of Emails, the status of a form Submit will be changed from Unread to Read as long as the Submit details have been read. To distinguish the two status, the system displays the Unread Submits in bold and the Read ones normally.
Process and Star: the two operation buttons have similar functions. You may use them flexibly based on your actual demands. For example, you may star important Submits like online messages requiring your reply first, and then mark the replied ones as Processed. Next time you check the list, you'll easily know the status of each submit. Besides, you may use the "Show Marked" feature to view the starred submits or the processed ones only.
Print, Remove and Pin Up: the 3 icons are located at the upper right corner of the quickview window. You may hit the "Print" to print the Submit, the "Remove" to delete the Submit, and the "Pin Up" to keep the preview window always showed so that it won't collapse even if you click other blank area in the page.
View Contact: if one Submit has created a contact, the "View Contact" icon will show up right next to "Star" icon. Clicking it, you are able to view the corresponding Contact Details page.
Comment: it is a user-friendly feature at the very bottom. You may use it to add unlimited number of comments in plain text. Anything relevant could be wrote down here and the existing comments could be deleted.
Search and Filter
Show Marked

"Show" tab is at the top left corner of the list, where you may choose options from the dropdown menu to display matching parts of Submits, such as Unread, Starred, Processed or Unprocessed Submits. You may also switch to show all Submits anytime. Show Marked feature is actually one of the filter features, whose filter condition is your actions towards Submits.
To the right of "Show" tab, there is a "Refresh" button. Since an active form might be visited and submitted at any time, you may use "Refresh" to check whether new submits come or not.
Search
Search feature enables you to search the content filled in and submitted by others, and the information derived from Submits like order numbers. Using this feature, you may fast find one or several Submits. For example, type the name or mobile number of a contact to look up their Submit details; search for pieces of words people wrote in the "Leave a Message" form to know who gives the suggestion; use an order number to find the matching Submit and check whether the customer has particular requirements or whether customer service representatives have written any comment.
Structural Filter
The Structural Filter is a powerful feature which allows you to filter Submits by the form questions. For example, you may sort out Submits with the filter condition "Option A is selected in the first multiple-choice question".

The function of structural filters works the same like that of contact filters. You may add filter conditions based on your needs. The logic relationship between/among multiple conditions is "AND". In other words, the filter result will be these Submits that meet all the filter conditions.
The Structural Filter is free for filtering the Submit Date only. If you want to filter other Submits content, you need to buy the Structural Filter Extension.
Data Linkage
When you've filtered Submits or shown them by the marked status, the statistical charts will be changed accordingly, because the downloadable charts is generated from the data in the current Submits list.
Meanwhile, you may select some Submits, use Export Submits under the Bulk Edit dropdown list to download the selected Submits to an Excel file. These features used together will surly meet your daily demands for sorting data and are absolutely powerful office tools everyone wants.