After clicking "Forms" on the navigation bar, you will enter the form list page, which is also called Form Manager page. There, you are able to create a new form and manage the existing forms. Now, let's take a closer look at the features in the page.
Form Groups Toolbar

The Form Groups toolbar is at the top of the page, which consists of form groups, search box, and "New Form" button.
Default Form Groups
The system has 4 pre-defined form groups:
All: it collects the forms created by all the members in your MikeCRM organization;
Starred: you may star a form to follow it, which will be marked with a yellow star and be categorized into this group. Moreover, after you've starred a form, the next time you visit the Form Manager page, the list will show the Starred group firstly by default, allowing you to check the updates of the starred ones directly.
Mine: the group stores forms created by you only.
Ungrouped: You can create form groups more than the four pre-defined ones. If your forms haven't been classified into any of your customized form groups, they will be categorized into the Ungrouped one.
Manage Form Groups
Clicking the hamburger icon "…" at the right side of the Ungrouped, you will open a pop-up window to manage groups like creating a new group by hitting Add Group button, and renaming or deleting existing groups. Please note that deleting a form group will not delete the forms in it. After the group has been deleted, the forms in it enter the Ungrouped group.
We don't limit the number of form groups you can create. However, if there are too many groups, the later created ones will be collapsed to maintain a good layout. And you need to click "…" button to unfold them. You may also place some groups ahead of others by starring them in the Manage Groups window. Since the starring actions of each member are fully independent, you need not to worry that your starring actions will change the form group order of other members.
Search Box
The search box is on the right of form groups. It is the place where you can search forms by inputting form names and pressing Enter key. The matching forms will be displayed in the form list below. FIY: form names are the names viewed in the form list, and they are not the form titles.
Right next to the search box, there is a green button labelled with "+ New Form". Clicking it, you can start the process to build a new form.
Form List
Every form folder is actually a form list, consisting of one form per row. There are many details in the form list, and let's go into them one by one.
Sort
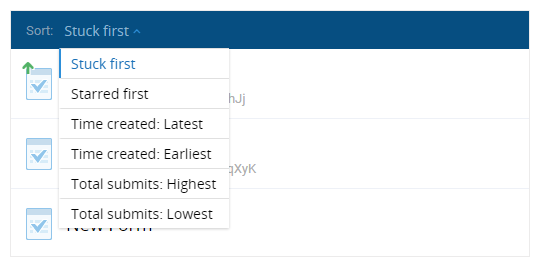
At the same form list, the display order of different forms matters a lot, since we always want to view them based on our needs. By default, the system arranges sticky forms firstly and then sort the rest by created time in descending order. Besides, there are other sort options:
Starred first: it means the starred forms will be placed at the top of a list, and the rest forms will be displayed by created date.
Time created (Latest/Earliest): it means forms will be sorted by the date and time they were created.
Total Submits (Highest/Lowest): this means the system will arrange forms by the number of Submits the forms have collected.
Form Records
Form records are making up of forms row by row. The basic units of each form record cover plenty of information relevant to the form. Let's get familiar with them from the left to the right.

Form name: it's the name you set when you create a new form. To ease future management, you are strongly recommended to modify the default name "New Name" to the one you like. You can also rename the existing one by hovering over a form record and clicking the pencil icon next to the form name. In addition, clicking the form name will open a window to quickview the form.
Form URL: it is the URL to visit the form. When you mouse over a form record, "link" icon will show itself next to the URL. You may click it to open and visit the form in a new window.
Other Status Icons
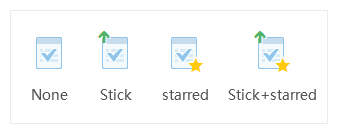
There is a default icon in front of each form record to tell sticky and starred status as the above image shows. The sticky forms have a green up arrow at the top left corner of the icon, and the starred forms have a yellow star at the lower right corner of the icon.
In addition to that, if a form is designed with special settings or widgets, the corresponding status icons will show themselves next to the form name to remind you.
 Visiting Settings: it suggests that the form uses a visiting setting option in the Global Settings, such as Visit by Password, Fill in the Form only in WeChat, and Active Period of Time.
 Logic Form: it indicates that the form uses Form Logic extension to hide or show questions based on the answers of people.
 Structural Filter: the icon shows when the form has been enabled with Structural Filter extension.
 Rank Calculation: a form enabled Rank Calculation extension will have the icon in the record.
Group
The column shows which group the form belongs to. One form can be categorized into only one group. You may click the group name in the record to change a form's group and manage your form groups by the way.
Status
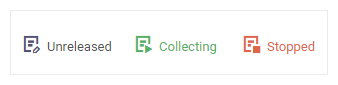
A form can have 3 kinds of status in total: Unreleased, Collecting, and Stopped. A newly created form with Unreleased status does not have form link, so that visitors cannot access nor submit the form. After released, it enters Collecting status. However, you may switch the form status to Stopped by clicking the grey square button at the right side of the form record. Please note, after the click, the button will change from the grey square to green triangle. Clicking the green triangle button will switch the Stopped to Collecting, reactivating the form to collect Submits.
Tips: With the Active Period of Time or Submit Limitation set, the form will be in the status of Collecting even if it is outside the active period or its Submits has reached the upper limit. In addition, the number of Submit limitation and the active period will be showed directly below the Collecting status.
Submit Quantity

The Submit quantity tells how many Submits the form has collected and the red badge icon displays unread Submits count. Clicking the button, you can enter corresponding Submit Manager page to view Submit list and charts.
Last Submit
It refers to the date and time when the last Submit comes in, helping you know the updates of its submit.
Created by/at
It shows the form creator as well as the date and time the form was created.
Operation Buttons
3 operation buttons are at the very right of a record.
Edit button: clicking it, you can enter the form design page to change form content and settings.
Status button: as mentioned above, a form will be assigned "Unreleased", "Stopped" or "Collecting" based on its current status. The button can be used to adjust form status. In detail, when a form is Unreleased, the button is displayed with a green airplane and clicking it will quickly release a form; when the form is in the state of collecting, the button is labelled with grey square icon and clicking it will change the status to Stopped; after you stop a form, the button is a green triangle and hitting it will switch the form to Collecting.
More Options
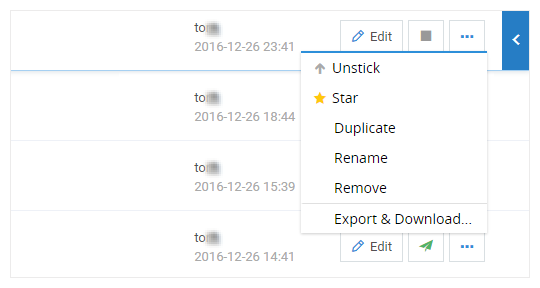
- Stick and Star: the two options enable you to stick/unstick and star/unstar the form respectively.
- Duplicate: by the feature, you are able to create a copy of the form in seconds. And the new form could be released after you fine-tune it.
- Rename: clicking it, you will enter the process of changing the form name.
- Remove: you are able to delete a form by hitting remove. However, the operation delete both the form and its Submits. Please use the feature with caution.
- Export & Download: Based on whether Submits contains images/files uploaded, the format to export submits and download form files differs. MikeCRM supports you to export the Submits to an Excel file and download the uploaded files as a package. When the total number of Submits exceeds 6,000 or the size of the uploaded files exceeds 18 M, the process of exporting submits and downloading uploaded files will be handled at the backend of the system, which means the system will send you the downloaded files or the link to download the files via an email after the backend download has been completed. Please check the email in your email box then.
Tips: it is worthy of mention that sticky feature has an impact on every member in your MikeCRM organization. When you make a form sticky on top, the form will also be sticky in other member's form list. However, star feature works only to you. So, if a form just requires your attention rather than other members', you may star it rather than stick it.
Form Quickview
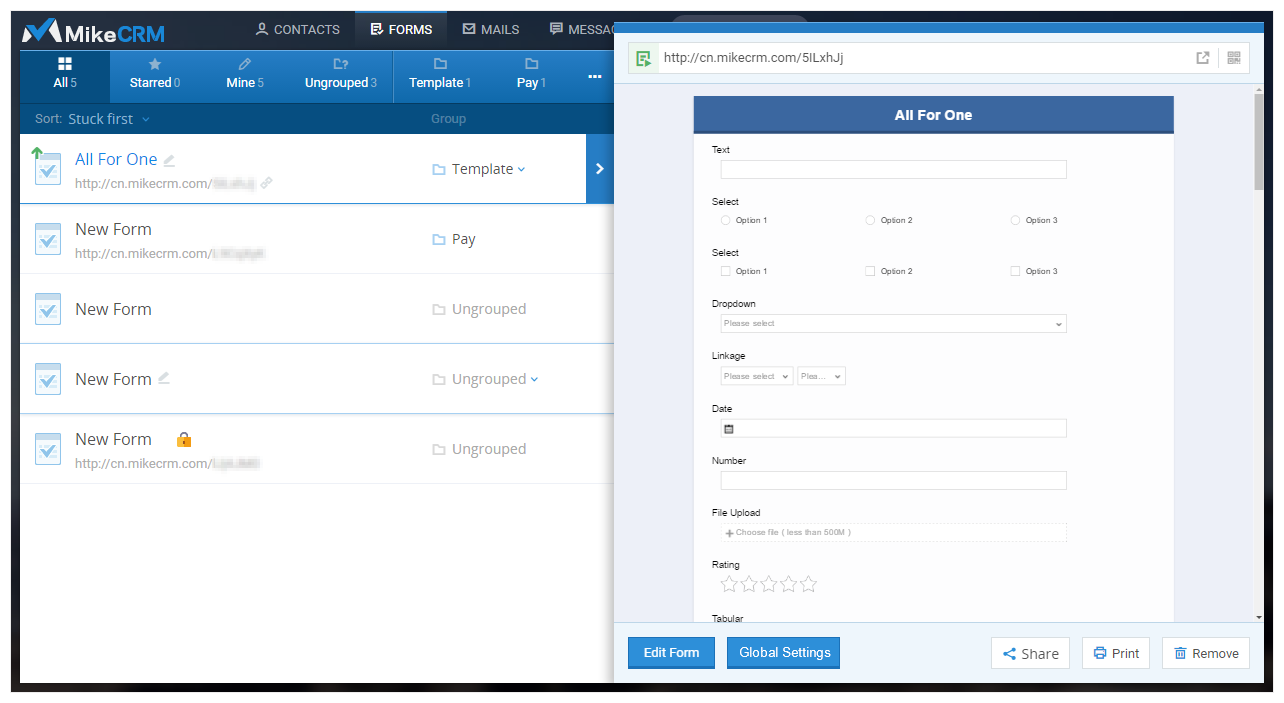
In common with quickview feature in the contact list, you may open form quickview page by hovering over a form record and hitting the blue arrow at the right of the record, or double clicking any blank space in the record. Besides, the form quickview page will also appear if you click the form name.
The quckview page simulates a small-size browser window and presents the scale-down version of the current form where you may fill in the form but cannot submit it.
The form link and a QR code icon lie at the top of the window. The icon next to QR enables you to directly open the form in a new window. There are also several common controls at the bottom: Edit Form, Global Settings, Share, Print and Remove. As we have introduced these features, we're not going to introduce them here. In short, you can click one of them and enter the corresponding operation interface.